Brushes are the most versatile tool in any makeup kit. They give you precision, waste less product, and last years instead of months. That said, sponges and fingers each do a few things genuinely well, and knowing when to reach for each one saves you time and product. This guide breaks it down product by product so you can stop guessing and start choosing the right tool for the job.
Get a personalized eye makeup tutorial matched to your color seasonThe Quick Answer: Brushes vs Sponges vs Fingers by Product
If you want the short version, here it is. This table covers the most common products and the tool that gives you the best result with each.
| Product Type | Best Tool | Finish Result | Pro Tip |
|---|---|---|---|
| Powder foundation | Brush | Smooth, airbrushed | Buff in circles with a kabuki brush |
| Liquid foundation | Brush (or sponge for sheer finish) | Buildable, even | Stipple with a flat-top brush for medium-full coverage |
| Cream/stick foundation | Fingers, then brush | Skin-like, melted in | Warm product with fingers, then blend edges with a brush |
| Concealer (spot) | Fingers | Targeted, pressed in | Warm concealer with ring finger for gentle pressure |
| Concealer (undereye) | Brush | Precise, buildable | Use a small tapered brush to set edges cleanly |
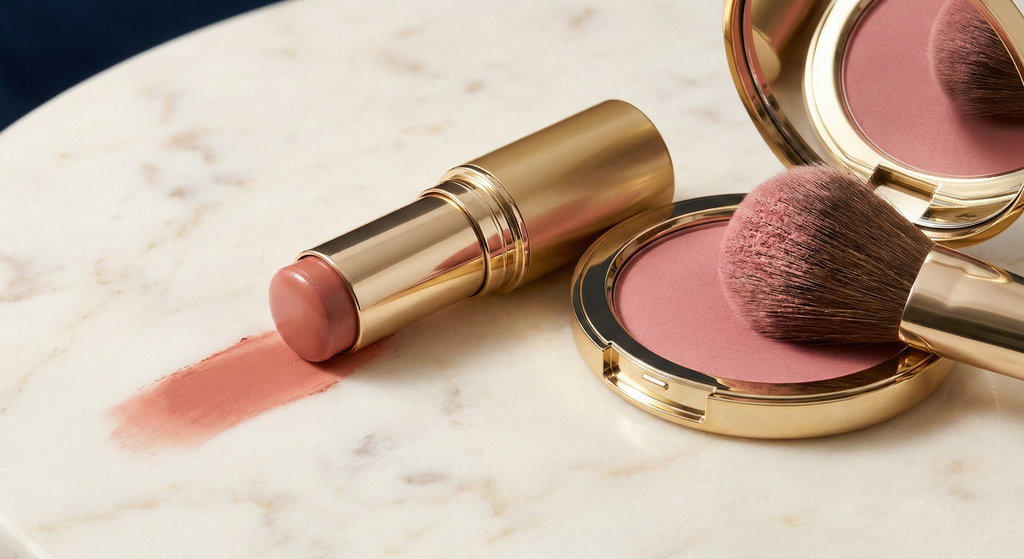
| Powder blush | Brush | Diffused, natural | Tap off excess before applying |
| Cream blush | Fingers | Dewy, seamless | Pat onto cheeks and blend outward |
| Bronzer | Brush | Sculpted, controlled | Use a fluffy angled brush for cheekbone placement |
| Eyeshadow | Brush | Precise, layered | Flat brush to pack, fluffy brush to blend |
| Highlighter | Brush or fingers | Targeted glow | Fan brush for subtle; finger press for intense |
Brushes win the majority of categories because they combine precision with controlled product placement.
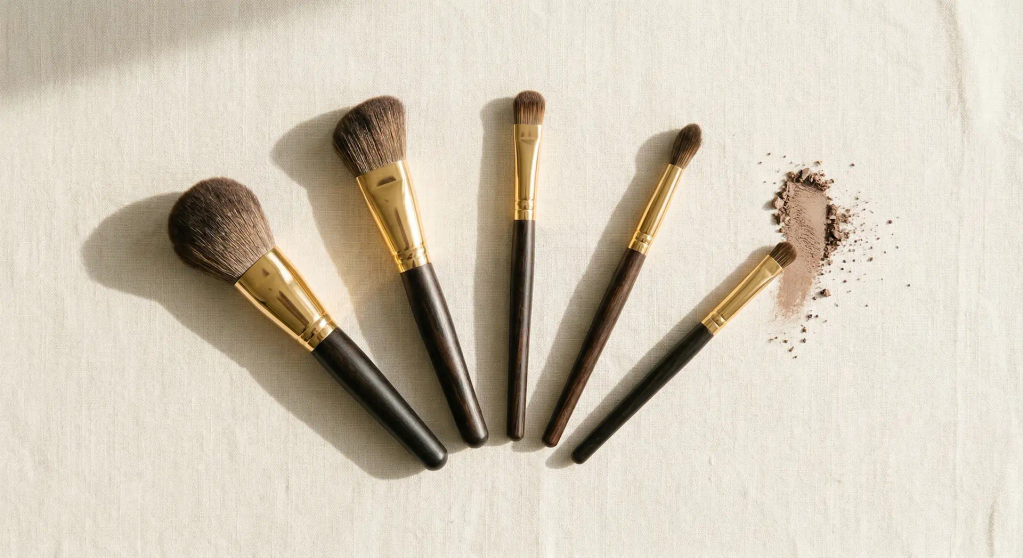
Why Makeup Brushes Deserve the Top Spot
Brushes do more things well than any other application tool. They earn that spot for specific, measurable reasons.
Precision and control. A brush can reach any area of the face with targeted application. You can place product exactly where you want it, then blend exactly as far as you want it to go. Sponges and fingers are blunter instruments by comparison.
Product efficiency. Almost all the product on a brush transfers to your skin. Sponges, even damp ones, absorb product into their porous core. Real Techniques marketed a "Makeupsaver" sponge claiming 90% less absorption, which tells you how much standard sponges waste.
Versatility. Brushes work with powder, cream, and liquid formulas. A single brush set covers foundation, blush, contour, eyeshadow, and highlighter. No other tool handles that range.
Longevity. A quality brush set lasts 1 to 3 years with weekly cleaning. A beauty sponge needs replacing every 1 to 3 months. At $20 to $30 per sponge replaced four times a year, that is $80 to $120 annually on a disposable tool. Brushes are a one-time purchase.
Specialized shapes. Every brush is designed for a specific task: flat top for foundation, dome for blending, angled for contour, pencil for detail. That specialization means better results with less effort.
A quality brush set is a one-time investment that outperforms disposable tools in precision, product transfer, and long-term value.
When a Sponge Actually Makes Sense
Sponges have a few legitimate strengths, but they come with trade-offs that limit their role.
Sheer, skin-like foundation finish. This is where sponges genuinely outperform brushes. The bouncing, stippling motion deposits thinner layers of liquid foundation than a brush can achieve, producing a finish that looks like skin instead of makeup. If you want the lightest possible coverage with liquid foundation, a damp sponge is the right call.
Baking undereyes. A damp sponge presses translucent powder tightly into the undereye area for the setting technique known as baking. A brush cannot apply the same concentrated pressure.
Diffusing harsh edges. After applying concealer or contour with a brush, bouncing a damp sponge over the edges softens any visible lines. It is a finishing step, not a primary application method.
The trade-offs are real, though. Even a fully dampened sponge absorbs product into its porous interior. Sponges need replacing every 1 to 3 months because their porous, often-damp structure creates ideal conditions for bacterial and yeast growth. A PMC study on cosmetic tool contamination found that porous tools harbor significantly more bacteria than non-porous ones. The AAD recommends cleaning brushes every 7 to 10 days; sponges need cleaning after every single use to stay sanitary.
Sponges produce a beautiful sheer finish with liquid foundation, but their product absorption, replacement cost, and hygiene demands make them a specialist tool, not a daily workhorse.
Fingers: The Underrated Third Option
Fingers get overlooked, but they do a few things neither brushes nor sponges can match.
Body heat is the advantage. Your fingertips warm cream products on contact, helping them meld into the skin instead of sitting on top. This makes fingers the best tool for cream blush, primer, and spot-correcting with concealer. The product warms up, thins out slightly, and presses into the skin in one motion.
The ring finger trick. Your ring finger naturally applies the lightest pressure of any finger, making it ideal for patting concealer into the delicate undereye area without tugging or over-blending.
Zero cost, zero cleanup. Fingers are always available, never need replacing, and never harbor leftover product between uses (assuming you wash your hands before and after).
Where fingers fall short. Large-area coverage, powder products, and precise placement all go better with a brush. Eyeshadow application needs a brush for packing and blending (though pressing foil or glitter shimmers with a fingertip is the exception, since body heat activates shimmer binders). Avoid finger application if your skin is broken or acne-prone, since direct contact introduces more bacteria than a clean brush.
Fingers are the fastest, cheapest application method for cream products and small-area corrections, but they lack the precision and coverage control of a brush.
What About Eyeshadow? The Tool Matters Most Here
Eyeshadow is where the tool choice makes the biggest difference in your final result. This is also where you cannot skip brushes.
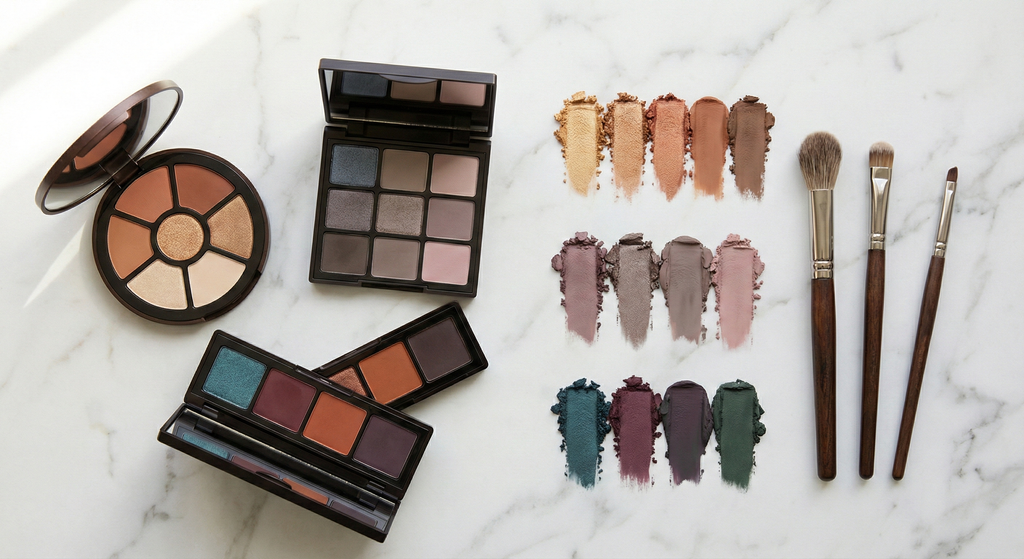
Flat shader brush for packing color. Nothing else deposits pigment onto the lid as densely or as evenly. Press the brush flat against the lid and pat color on in short strokes. This is how you get real color payoff from even the most stubborn matte shades. For more on building a look step by step, see our guide to eyeshadow palette techniques.
Fluffy blending brush for crease work. A polished eyeshadow look comes down to blending, and that means a fluffy brush with soft bristles sweeping back and forth through the crease. Fingers cannot replicate this motion. Sponge-tip applicators are too stiff and imprecise.
Pencil brush for detail. Lower lash line work, inner-V definition, and smudging liner all need a small, precise brush. For guidance on working with your specific eye shape, we have a dedicated breakdown.
Fingers for shimmer and glitter. The one exception. Foil and glitter eyeshadows stick better when pressed on with a fingertip because body heat activates the binders in the formula. A brush can scatter loose shimmer particles.
For eyeshadow, brushes are non-negotiable for building and blending color, with fingers reserved for pressing shimmers and metallics.
Discover Your Perfect Eye Look
Get your first AI-personalized look in under 5 minutes.


The Hybrid Approach: Why Pros Use All Three (But Start With Brushes)
Professional makeup artists do not commit to a single tool. They use all three, but brushes carry the load.
A typical professional workflow looks like this: apply foundation with a flat-top brush for even, buildable coverage. Bounce a dampened sponge over the edges to melt the foundation into the skin. Press shimmer onto the lids with a fingertip. Set everything with a fluffy powder brush.
Each tool handles the step it is genuinely best at. But notice that the brush does three of those four steps. If you are building a kit from scratch, invest in brushes first. A sponge and your fingers are supplements, not replacements.
For guidance on how tool choice interacts with product formula, see our guide to cream vs powder formulas.
Professional makeup artists build their kit around brushes and add sponges and fingers for the specific finishing steps that benefit from them.
Hygiene and Maintenance Compared
How you care for your tools matters as much as which tool you choose. This table compares all three on hygiene, cost, and maintenance.
| Factor | Brushes | Sponges | Fingers |
|---|---|---|---|
| Cleaning frequency | Weekly (AAD recommends every 7 to 10 days) | After every use | Wash hands before and after |
| Replacement timeline | Every 1 to 3 years | Every 1 to 3 months | N/A |
| Bacteria risk | Moderate (manageable with regular cleaning) | High (porous, damp interior is ideal for bacteria and yeast) | Low if hands are clean |
| Annual cost | One-time investment ($30 to $80 for a quality set) | $80 to $120/year (at $20 to $30 per sponge, replaced 4 times) | Free |
| Ease of cleaning | Swirl in brush cleanser, rinse, reshape, air dry | Squeeze with soap under running water, wring, air dry fully | Soap and water |
| Environmental impact | Low (long lifespan, recyclable handles) | Higher (frequent disposal, synthetic foam) | None |
Brushes are the most hygienic long-term choice when cleaned weekly, while sponges demand more frequent replacement and cleaning to stay safe.
Frequently Asked Questions