You probably own more eyeshadow than you think you do. A couple of full-size palettes, a few quads, maybe a single or two that came in a gift set. Add it all up and you are looking at dozens of individual shades sitting in your drawer right now. How many of them do you actually use?
If the answer is "about four or five," you are not alone. A 2015 survey by Stowaway Cosmetics and Poshly found that the average woman owns around 40 makeup products but only reaches for about 5 of them daily. Roughly 75% of women never finish a product before it expires or gets pushed to the back of the drawer. Eyeshadow palettes are some of the worst offenders. You buy a gorgeous 12-pan palette because four of the shades caught your eye, and the other eight sit untouched until they eventually dry out or get decluttered.
That is not a palette problem. It is a strategy problem.
Most of us were never taught how to approach an eyeshadow palette as a system. We pick the shades that feel safe, ignore the ones that feel intimidating, and never build a mental framework for how all those colors are meant to work together. This guide is going to change that. You will learn how to audit your collection, group shades into usable combinations, and apply two simple formulas that will make every palette in your drawer earn its keep.
Get AI-personalized looks from your own palettes with BeautySparkThe Palette Audit
Before you can use your palettes better, you need to know what you actually have. Most people have a vague idea of their collection but have never laid everything out and looked at it systematically. This is where you start.
Step 1: Pull everything out. Every palette, every quad, every single. Lay them all open on a flat surface where you can see every shade at once. This includes the palettes you forgot about in the bottom of a bag and the ones you shoved to the back of a shelf. All of them.
Step 2: Identify the wear patterns. Look at each pan individually. Which ones show heavy use (the ones where you have hit pan or the surface is visibly worn down)? Which ones are completely untouched, still smooth and factory-fresh? And which ones have been swatched once or twice but never really used in a look? This tells you a lot about your habits. The heavily used pans are your comfort zone. The untouched ones are your opportunity.
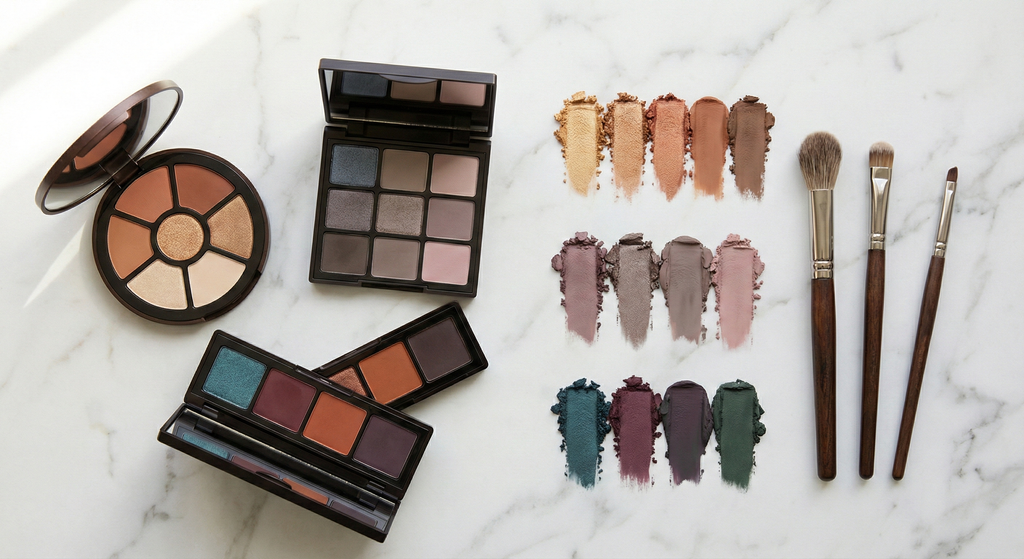
Step 3: Categorize by finish. Go through each shade and mentally tag it as matte, shimmer, satin, or glitter. This matters because finish determines function. Mattes are your workhorses for blending, transition, and definition. Shimmers and satins are your statement pieces for the lid and inner corner. Glitters are accents. Knowing the finish breakdown of your collection tells you whether you have a balanced toolkit or whether you are heavy in one area and missing another.
Step 4: Note what you reach for and what you avoid. Be honest with yourself. Which specific shades do you grab every single time? Usually these are a neutral transition shade, one reliable lid shimmer, and maybe a dark brown for the outer corner. And which shades do you skip? Often the skipped ones are bright colors, unusual undertones, or very dark shades that feel too bold. Write these patterns down. Awareness is the first step toward breaking out of a rut.
Why untouched pans are not wasted yet
An untouched shade is not a bad purchase. It just means you have not found the right combination for it yet. Many of those ignored pans are perfectly usable accent shades, lower lash line colors, or transition tones for different skin undertones. The strategies below will help you find a role for many of the shades you own, though some shades may genuinely be wrong for your color season, and no amount of clever placement will make them work. That is useful information too.
The Color Grouping Strategy
Once you have completed your audit, the next step is to stop thinking about palettes as single units and start thinking about them as collections of color groups. A well-designed 12-pan palette usually contains two or three complete "looks" within it. You just need to learn how to see them.
Here is how to group your shades.
Warm Neutrals Group
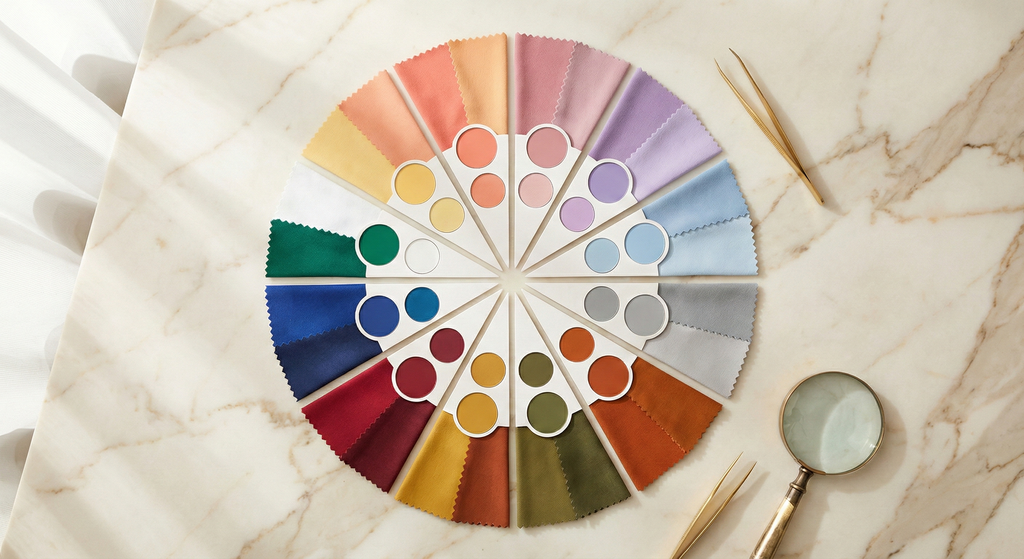
Pull out every shade that reads warm and neutral: warm taupes, golden browns, soft peaches, warm beiges, copper tones, caramel shades. If you belong to a warm color season like True Autumn or True Spring, these are your core neutral colors: the ones you will reach for most and the foundation of your everyday looks. Most palettes have at least three or four of these, and they pair together effortlessly. However, if you are a cool season (any Summer or Winter), these warm neutrals will not be your everyday shades. They will look muddy or orange against your skin. Set them aside and focus on the cool neutrals group below instead.
Cool Neutrals Group
Now pull out the cool-toned neutrals: cool taupes, gray-browns, mauves, dusty pinks, cool plums, slate tones. These are the shades that lean pink, purple, or gray rather than golden. If you are a cool season (any Summer or Winter), these are your core neutral colors, the equivalent of what warm taupes and golden browns are for warm seasons. These should be the foundation of your everyday looks. If you are a warm season, cool neutrals will generally not flatter you and may make your skin look dull or gray.
Accent and Pop Colors
These are the shades that stand out: a teal, a burgundy, a forest green, a burnt orange, a sapphire blue. Every palette that is not strictly neutral has a few of these. They are often the most underused shades in any collection because people do not know where to put them. The answer is simpler than you think: accent colors work beautifully on the lower lash line, as a thin liner smudged along the upper lash line, on the outer corner for a subtle color story, or patted onto the center of the lid over a neutral base. One pop of color is all you need to turn a basic look into something interesting.
Darks and Liners
Finally, group your darkest shades: black, dark brown, charcoal, deep plum, navy. These function as eyeshadow liners and outer-corner definition shades. A stiff, small brush and a dark matte shadow can replace pencil or liquid liner entirely, giving you a softer, more blended line that is much more forgiving to apply. You only need a tiny amount, which is why dark pans often look untouched even if you use them regularly.
Seeing Multiple Looks in One Palette
Here is the payoff. Once you have grouped your shades, look at each palette through the lens of those groups. A typical 12-pan palette might contain a warm neutral look (transition, lid, definition from the warm group), a cool-toned look (transition, lid, definition from the cool group), and one or two accent looks where you pair a neutral base with a pop color from the accent group. That single palette you thought only had one usable look? It probably has three or four once you know how to see them.
The 3-Shade Formula
If you take nothing else from this guide, take this. The 3-shade formula is the simplest way to create a complete, polished eye look from any palette. It works for beginners and experienced makeup users alike, and it works whether your palette has 4 pans or 40.
Shade 1: Transition
Pick a matte shade that is close to your skin tone but slightly deeper: one or two shades deeper than your natural lid color, in a tone that matches your undertone. If you are warm, that means a warmer transition shade (warm taupe, soft peach-brown). If you are cool, it means a cooler transition shade (cool taupe, mauve, dusty rose). Going warmer when you are cool, or cooler when you are warm, is one of the most common reasons an eye look falls flat. This is your transition shade. Apply it with a fluffy blending brush into the crease and slightly above, using windshield-wiper motions to blend it out. The transition shade creates a gradient between your bare skin and the more pigmented shades that come next. It should look like a soft, natural shadow.
If you are not sure which shade in your palette qualifies, look for the one that is just a step deeper than your skin. It should almost disappear when you blend it out. If it looks bold or obvious, it is too dark for this role.
Shade 2: Lid
Pick a shimmer, satin, or metallic shade and pat it onto the center of your mobile lid (the flat area between your lash line and your crease). Use your fingertip or a flat shader brush and press the color on rather than swiping, as pressing preserves the shimmer and gives you more pigment payoff. This shade is the focal point of the look. It catches light, draws attention to your eyes, and provides most of the visible color.
Your lid shade can be close in tone to your transition shade for a subtle look, or it can contrast for something bolder. If you are warm-toned, a warm gold lid over a warm taupe transition is classic and safe. If you are cool-toned, a silver-pink shimmer over a cool taupe transition is equally effortless. The key is keeping the undertone consistent with your coloring.
Shade 3: Definition
Pick a dark matte shade and apply it to the outer V of your eye (the triangular area where your crease meets your upper lash line at the outer corner). Use a small, precise blending brush. Start by placing the color at the outermost point, then blend inward along the crease and downward along the lash line. You do not need much product. The goal is to add depth and dimension, not to create a harsh dark patch.
This shade can also double as an eyeshadow liner if you pack it tightly along the upper lash line with a thin, angled brush.
Pulling the 3-Shade Formula From Any Palette
Open any palette you own right now. Find a matte that is close to your skin tone. Find a shimmer or satin that appeals to you. Find a dark matte. Congratulations: you have a complete look. The transition goes in the crease, the shimmer goes on the lid, the dark shade goes on the outer corner. This formula gives you a usable look from almost any palette, as long as the shades suit your color season. If you are cool and your palette is entirely warm, the formula still works structurally, but the colors will not flatter you. Eye shape also affects placement, so adapt the formula to your anatomy.
Find Your Best 3-Shade Combinations Instantly
BeautySpark scans your palettes, scores every shade for your color season, and builds complete looks using your actual products. No guesswork needed.


The 5-Shade Formula
Once you are comfortable with the 3-shade formula, expanding to five shades adds polish and dimension without adding much complexity. You are keeping the same three core shades and adding two more.
Shade 4: Inner Corner Highlight
Choose the lightest, most reflective shade in your palette: a champagne shimmer, a pale gold, a white satin, or any light shade with some sheen. Dab it onto the inner corner of your eye, right where your upper and lower lash lines meet. This tiny pop of light opens up the eye, makes you look more awake, and creates a visual lift. It takes three seconds to apply and makes a noticeable difference.
Shade 5: Lower Lash Line
Take your transition shade (Shade 1) or a complementary medium tone and run it along the lower lash line with a small smudge brush. This connects the upper eye look to the lower eye and creates a more finished, cohesive appearance. You can follow it with a touch of your lid shimmer on the outer third or inner third of the lower lash line for extra dimension.
The lower lash line is also where those accent and pop colors from your color grouping strategy shine. A subtle smudge of teal, burgundy, or bronze along the lower lash line adds unexpected interest without being overwhelming.
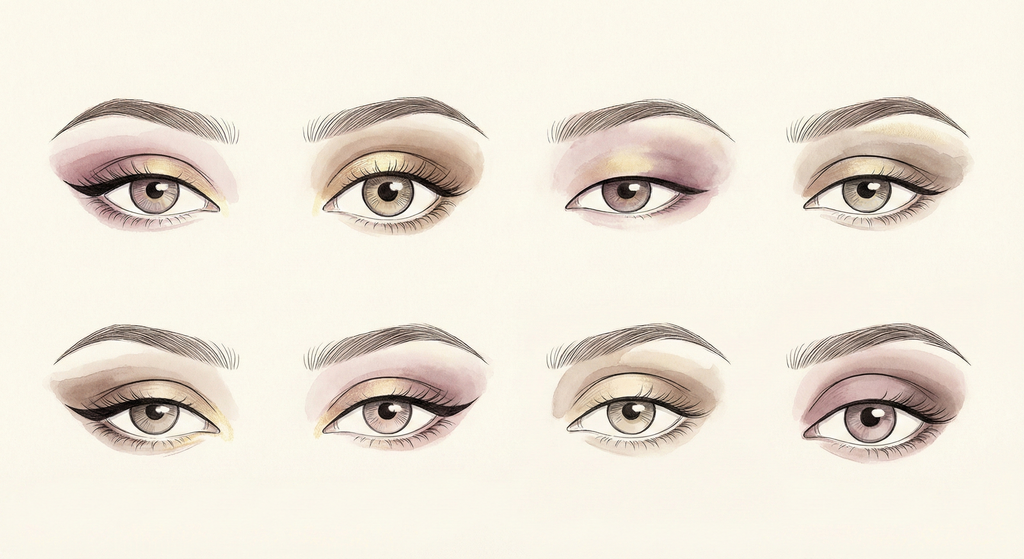
Where you place these five shades depends heavily on your eye shape. Shadow placement that works for almond eyes looks entirely different on hooded or monolid eyes. If you are not sure how to adapt placement for your specific eye anatomy, our eye shapes guide breaks down techniques for all eight common eye shapes.
Cross-Palette Mixing
Here is a habit that will immediately expand your options: stop limiting yourself to one palette per look. There is no rule that says every shade in a look has to come from the same palette. In fact, some of the best combinations happen when you pull from two or three palettes at once.
Maybe your favorite transition shade lives in your everyday neutral palette, but the perfect shimmer lid shade is in that colorful palette you rarely touch. Maybe you love the dark brown from one palette but the warm taupes from another. Mixing palettes frees you from the specific color story a brand intended and lets you build your own combinations based on what actually works for your coloring.
A few practical tips for cross-palette mixing:
- Start with your transition shade. Pick the best transition shade you own: the one that suits your color season and that you always reach for. That is your anchor. Before defaulting to habit, check that this shade actually matches your undertone. If it is warm and you are cool, it may be time to find a new anchor. Then pull a lid shade and definition shade from anywhere else in your collection.
- Match undertones to YOU first, then to each other. The shades you mix across palettes must match your personal undertone. If you are warm, mix and match warm shades freely across palettes. If you are cool, stick to cool shades. The key is not just keeping undertones consistent within a look, but keeping them consistent with your coloring. A warm shimmer from one palette pairs naturally with warm mattes from another, but only if you are warm. For cool-toned people, the same logic applies with cool shades.
- Use singles and small palettes as supplements. Those two-pan or four-pan palettes and individual singles are perfect for filling gaps. If your main palette has great mattes but weak shimmers, keep a shimmer single nearby for the lid.
Cross-palette mixing also dramatically reduces the temptation to buy new palettes. When you realize you can create almost any combination from what you already own by mixing across palettes, the urge to buy the latest release because of one or two new shades fades significantly.
How Palette Scanning Changes Everything
Everything above (the audit, the color grouping, the formulas, the cross-palette mixing) works on its own. But there is one question these strategies cannot answer by themselves: which of your shades are actually the best match for your specific coloring?
You might love a particular bronze shimmer, but if you are a Cool Summer, that warm bronze is working against your natural undertone every time you wear it. Meanwhile, the dusty mauve shimmer you always skip might be a near-perfect match for your color season. Without understanding your personal color profile, you are making combinations based on general appeal rather than individual flattery.
This is where BeautySpark's palette scanning becomes genuinely useful. When you photograph your palettes, the AI extracts every individual shade, analyzes its color properties, and scores it against your personal color season. Each pan gets a compatibility score that tells you how well it harmonizes with your skin tone, undertone, and overall coloring.
Suddenly, your palette audit has a whole new layer of information. Those shades you always skipped? Some of them might score higher than the ones you have been reaching for. Those accent colors that felt too bold? The AI can tell you which ones are actually in your seasonal palette and worth experimenting with. And when BeautySpark builds a complete look for you, it selects shades from your scanned palettes using both the 3-shade and 5-shade placement logic and your individual color season data, so every recommendation is designed for your face, using products you already own.
It is the practical bridge between knowing the theory and actually applying it to your specific situation. The formulas tell you where to put each shade. Your color season tells you which shades to choose. And palette scanning puts those two things together using the exact products sitting in your drawer.
Rediscovering neglected palettes
Many BeautySpark users report that palette scanning helped them fall back in love with palettes they had written off. A palette that felt 'wrong' as a whole can contain individual shades that score exceptionally well for your color season. The AI finds those hidden gems and builds looks around them.
Putting It All Together
The goal of this entire guide is to shift your relationship with the palettes you already own. Instead of grabbing the same four shades every morning, you now have a framework: audit your collection, group your shades by color family and function, apply the 3-shade or 5-shade formula to build complete looks, mix across palettes for more variety, and use your color season to choose the shades that genuinely flatter your specific coloring.
You do not need to buy new palettes. You do not need to master elaborate editorial techniques. You need a system that makes the products you already own work harder for you. That system starts with understanding what you have, continues with knowing where to place each shade, and becomes truly personalized when you factor in your individual color profile.
The eyeshadow you already own has more potential than you think. Start using it.
Frequently Asked Questions
Get Looks Built From Your Own Palettes
BeautySpark scans your eyeshadow palettes, analyzes your color season and eye shape, and generates personalized looks using products you already own. Stop guessing and start wearing every shade in your collection.