Most makeup tutorials you have watched made one silent assumption: that your face is shaped the same as the person demonstrating. It is not. And that single difference, face shape, is why contour can look sculpted and intentional on one person and muddy and misplaced on another. It is why blush sometimes lifts your face beautifully and other times sits in a strange spot that ages you. It is why brows that look effortlessly polished on your friend look oddly wrong on you.
Face shape is not about what products you use. It is about where you place them. The same bronzer, the same blush, the same brow pencil can produce dramatically different results depending on where they land relative to your bone structure. Once you understand your face shape, every placement decision (contour, blush, highlight, brow arch) becomes intentional rather than random.
This guide covers the six most common face shapes, how to identify yours, and exactly where to place contour, blush, and brows for each one. No guesswork. Just anatomy-based placement that works.
Discover your face shape with BeautySparkHow to Determine Your Face Shape
You do not need measuring tape or a professional consultation. A mirror, good lighting, and about two minutes are all it takes.
Stand in front of a mirror with your hair pulled back so your full face outline is visible. Look straight ahead and observe three things:
1. Where is the widest point of your face? Is it your forehead, your cheekbones, or your jaw? This single observation narrows down your shape significantly. If your cheekbones are the widest point, you likely have an oval or diamond face. If your forehead and jaw are roughly equal in width, you may have a square or oblong face. If your forehead is widest, a heart shape is likely.
2. What is the ratio of face length to face width? Is your face noticeably longer than it is wide, or are the length and width roughly equal? Faces that are significantly longer than they are wide tend toward oblong or oval shapes. Faces where length and width are nearly equal tend toward round or square shapes.
3. What does your jawline look like? A sharp, angular jaw suggests a square face. A narrow, pointed chin suggests a heart or diamond shape. A soft, rounded jawline suggests an oval or round shape. A jaw that is roughly the same width as the forehead often indicates a square or oblong face.
With those three observations, you can identify which of these six shapes most closely matches yours:
- Oval: Slightly longer than wide, cheekbones are the widest point, forehead is slightly wider than the jaw, and the jawline is gently rounded. Often described as the most balanced face shape.
- Round: Width and length are roughly equal, cheekbones are the widest point, and the jawline is soft and curved with no sharp angles. Full cheeks are a defining characteristic.
- Square: Forehead, cheekbones, and jaw are approximately the same width. The jawline is strong and angular with a flat chin. The face may appear as wide as it is long.
- Heart: The forehead is the widest point, and the face tapers to a narrow, sometimes pointed chin. Cheekbones are often high and prominent. Sometimes called an inverted triangle.
- Oblong: Noticeably longer than it is wide, with a forehead, cheekbones, and jaw that are similar in width. The face may appear narrow. Sometimes called a rectangle if the jaw is angular.
- Diamond: Cheekbones are the widest point by a clear margin, while both the forehead and jaw are narrow. The face has an angular, geometric quality with prominent cheekbone structure.
Most people will clearly identify with one shape. If you feel like you are between two, that is normal. Face shapes exist on a spectrum, and you can borrow placement tips from both.
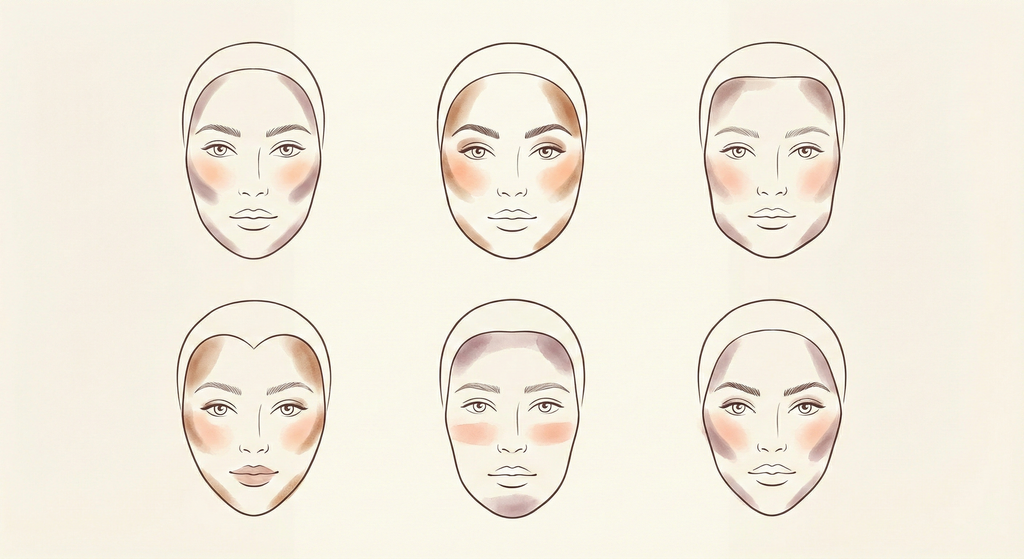
Contour, Blush & Brow Placement by Face Shape
Oval Face
Characteristics: The oval face is gently elongated, with cheekbones slightly wider than the forehead and a softly rounded jawline. The proportions are naturally balanced: no single feature dominates, and the face tapers gradually from cheekbones to a slightly narrower chin and forehead. This is widely considered the most versatile face shape for makeup placement.
Contour placement: Oval faces need very little corrective contour because the proportions are already balanced. Light sculpting under the cheekbones is enough to add definition without altering the shape. Apply contour starting from the top of the ear and blend diagonally down toward the corner of the mouth, stopping at the center of the cheek. Keep it subtle, as you are enhancing existing bone structure, not creating the illusion of different proportions. A touch of contour along the hairline at the temples adds depth without narrowing the face.
These tips enhance your natural oval proportions, but contour is also a creative tool. If you prefer a more angular look, you can apply contour more aggressively under the cheekbones and along the jawline. If you want a softer, rounder appearance, skip the temple contour and keep everything on the apples. The 'rules' above are a starting point, and your aesthetic preference is what matters.
Blush placement: Apply blush to the apples of the cheeks and blend outward and slightly upward toward the temples. Because the oval face is naturally balanced, placing blush on the apples gives a healthy, natural flush without disrupting the proportions. A soft, diffused application works best. You have a lot of flexibility here, as oval faces can carry blush in nearly any placement without looking off.
Brow shape: A soft, gentle arch complements the oval face beautifully. The arch should peak above the outer edge of the iris and taper naturally toward the tail. Avoid overly dramatic high arches, which can make an already balanced face look surprised, and avoid completely flat brows, which can make the face appear wider than it is. The goal is to mirror the natural softness of the face shape.
Round Face
Characteristics: The round face is nearly as wide as it is long, with full cheeks and a soft, curved jawline. There are no sharp angles: the hairline is typically rounded, the chin is soft, and the cheeks are the fullest part of the face. Round faces often look youthful because of the fullness and lack of angular definition.
Contour placement: Contour is your most powerful tool for adding structure and definition to a round face. Apply contour to the hollows of your cheeks: suck in your cheeks lightly and apply product in the depression that appears, then blend well. Add contour to the temples to reduce the visual width of the upper face. A light contour along the sides of the jawline from the ear to the chin also helps define the jaw and create the appearance of more angular bone structure. The key is blending everything downward and inward to create vertical lines that elongate the face.
That said, not everyone with a round face wants to look more angular. If you love the softness of your face shape, skip the heavy sculpting and use contour lightly just for definition rather than reshaping.
Blush placement: Place blush slightly higher on the cheekbones than you normally would and angle it diagonally toward the temples. Do not apply blush directly on the apples of the cheeks, as this adds volume to the fullest part of the face and emphasizes the roundness. Instead, start on the cheekbone itself and sweep upward toward the hairline. This creates a lifting effect that adds angularity and draws the eye upward.
Brow shape: A higher, more defined arch helps elongate a round face by drawing the eye vertically. The peak of the arch should sit above the outer edge of the iris or slightly further out. Avoid rounded brow shapes that echo the circular face outline, as you want to introduce angles to contrast the softness. A well-defined arch is one of the simplest ways to make a round face appear slimmer and more structured.
Square Face
Characteristics: The square face has a strong, angular jawline with a forehead, cheekbones, and jaw that are all roughly the same width. The jaw is wide and flat rather than tapered, and the chin is often flat or slightly squared off rather than pointed. The overall impression is one of strength and structure: strong horizontal and vertical lines create a bold, defined look.
Contour placement: The goal with a square face is to soften the angular corners while preserving the beautiful natural structure. Apply contour to the corners of the jaw (the outer edges where the jawline meets the ear) and blend downward to soften the sharp angle. Add contour to the outer edges of the forehead along the hairline at the temples. Under the cheekbones, apply contour in a slightly curved line rather than a sharp diagonal to introduce roundness. Avoid contouring the center of the jaw or chin, which can make the face look heavier.
Of course, many people with square faces love the strong jawline and prefer to emphasize it rather than soften it. If that is you, skip the jaw contour and focus only on the cheekbones for definition.
Blush placement: Apply blush to the apples of the cheeks and blend upward toward the temples in a sweeping, rounded motion. The rounded blush placement introduces curves that soften the angular bone structure. Avoid blush placement that sits in a straight horizontal line across the cheeks, which echoes the strong horizontal lines of the square jaw and forehead.
Brow shape: Soft, gently curved brows work best on a square face. Avoid angular or sharply arched brows, as they add more hard angles to a face that already has plenty of geometric structure. Instead, aim for a smooth, rounded arch with a gradual curve from the start of the brow to the tail. A slightly thicker brow with a gentle bend softens the overall look without sacrificing definition. The curve of the brow provides a visual counterpoint to the straight lines of the jaw.
Heart Face
Characteristics: The heart-shaped face is widest at the forehead and tapers down to a narrow, often pointed chin. The cheekbones are high and prominent, sitting close to the width of the forehead. The jawline narrows significantly, and the chin can appear quite delicate compared to the upper face. Some heart-shaped faces also feature a widow's peak at the hairline, which accentuates the heart silhouette.
Contour placement: Contour focuses on balancing the wider upper face with the narrower lower face. Apply contour to the sides of the forehead along the hairline to visually reduce the width of the upper third. A small amount of contour on the tip of the chin helps soften a very pointed chin if desired, though this is optional and depends on personal preference. Under the cheekbones, keep contour light and blend well, as aggressive cheekbone contour on a heart face can make the already narrow chin look even smaller by comparison.
If you prefer the tapered look of your heart shape and do not want to balance the proportions, skip the forehead contour and just use cheekbone definition. The technique above is corrective. Creative contour lets you decide how much of your natural shape you want to keep.
Blush placement: Apply blush to the apples of the cheeks and blend outward toward the ears, keeping the color in the mid-face zone. Avoid placing blush too high on the cheekbones or sweeping it upward toward the temples, as this draws attention to the already wide upper face. By keeping blush on the apples and blending horizontally or slightly downward, you add fullness to the mid-face area, which helps balance the wider forehead and narrow chin.
Brow shape: A soft, rounded arch suits the heart face well. The arch should be moderate (not too high, not too flat) with a gentle curve that follows the natural brow bone. Avoid very angular, sharply peaked brows, which can make the forehead appear even wider and draw attention to the top-heavy proportions. A softer, slightly rounded shape keeps the overall look balanced and prevents the upper face from overpowering the delicate lower half.
Oblong Face
Characteristics: The oblong face is noticeably longer than it is wide, with a forehead, cheekbones, and jawline that are roughly the same width. The face appears narrow and elongated, and the distance from the hairline to the chin is significantly greater than the width at the cheekbones. The jawline may be slightly rounded or gently squared, but the dominant feature is the vertical length. This shape is sometimes called a rectangle when the jaw is more angular.
Contour placement: The goal is to visually shorten the face and add width. Apply contour along the top of the forehead at the hairline to reduce the visual height of the upper face. Apply contour under the chin and along the jawline to visually shorten the lower face. Under the cheekbones, keep contour soft and relatively short. Avoid extending it too far toward the center of the face, which can make the face look even narrower. Instead, concentrate the cheekbone contour closer to the ear and blend outward. Adding a touch of highlight or bronzer to the sides of the face can also help create the illusion of width.
Some people with oblong faces enjoy the elongated, editorial quality of their proportions and do not want to shorten it. If that is your preference, focus contour on the cheekbones only for definition and skip the forehead and chin contour entirely.
Blush placement: Apply blush to the apples of the cheeks and blend horizontally, straight out toward the ears rather than upward toward the temples. Horizontal blush placement adds the illusion of width, which counteracts the elongated proportions. You can also extend blush slightly further across the face than you normally would. Avoid placing blush in a vertical stripe or blending it upward, which adds more length to an already long face.
Brow shape: Flat or straight brows work beautifully on oblong faces because they create a strong horizontal line that visually breaks up the vertical length. Keep the arch low and subtle, as a dramatic high arch draws the eye upward and makes the face look even longer. A straighter brow with a gentle, low curve near the tail end adds a visual horizon line across the mid-face that shortens the overall appearance. This is one of the few face shapes where a nearly flat brow is actually the most flattering option.
Diamond Face
Characteristics: The diamond face shape features cheekbones that are significantly wider than both the forehead and the jawline, creating a geometric, angular appearance. The forehead is narrow, the jaw tapers to a narrow but not necessarily pointed chin, and the cheekbones are high and dramatic. The overall silhouette resembles a diamond: narrow at the top and bottom, widest through the middle. This is one of the rarer face shapes and often has a striking, sculptural quality.
Contour placement: Contour on a diamond face is about softening the dominant cheekbone width while adding balance to the narrower forehead and jaw. Apply contour under the cheekbones in a short, well-blended stroke to reduce the visual prominence of the widest part of the face. Keep it close to the cheekbone and avoid extending it too far forward or it will look like a dark stripe. A tiny bit of contour on the tip of the chin is optional and depends on whether you want to soften the lower taper. Avoid contouring the forehead or temples heavily, as the forehead is already narrow and adding contour there will make it look even smaller.
If you love the angular, sculptural quality of your diamond shape and want to play it up rather than soften it, skip the cheekbone reduction and instead use contour to sharpen the angles even further. Contour is not only corrective. It is whatever you want it to be.
Blush placement: Apply blush directly on the cheekbones and blend upward toward the temples. This might seem counterintuitive since the cheekbones are already the widest point, but placing blush on the high point of the cheekbone and sweeping it upward creates a lifted, cohesive look that works with your bone structure rather than against it. Avoid placing blush on the apples of the cheeks and blending outward, which can exaggerate the width of the mid-face. Keeping blush higher and more compact is the key.
Brow shape: Curved, softly rounded brows complement the angular diamond face beautifully. The curves of the brows provide a contrast to the geometric lines of the cheekbone and jaw structure. A gentle arch with a rounded shape from the front of the brow through the peak to the tail softens the overall look. Avoid very straight brows, which can make the narrow forehead appear even more compressed, and avoid very angular brows, which add more hard lines to an already angular face.
Get Contour, Blush & Brow Placement for YOUR Face Shape
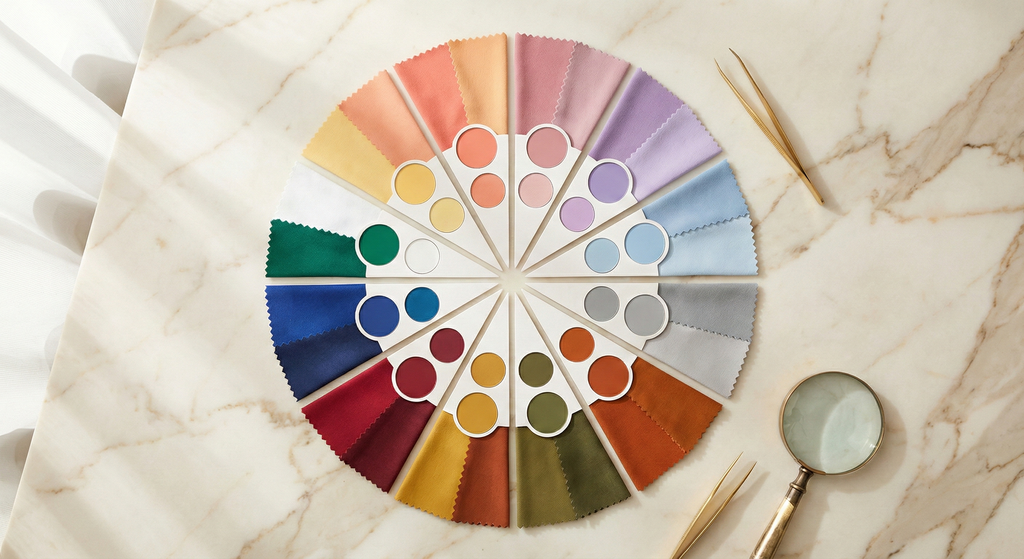
BeautySpark analyzes your face shape, eye shape, and color season to recommend makeup placement that actually works for your bone structure.


Face Shape + Eye Shape = The Full Picture
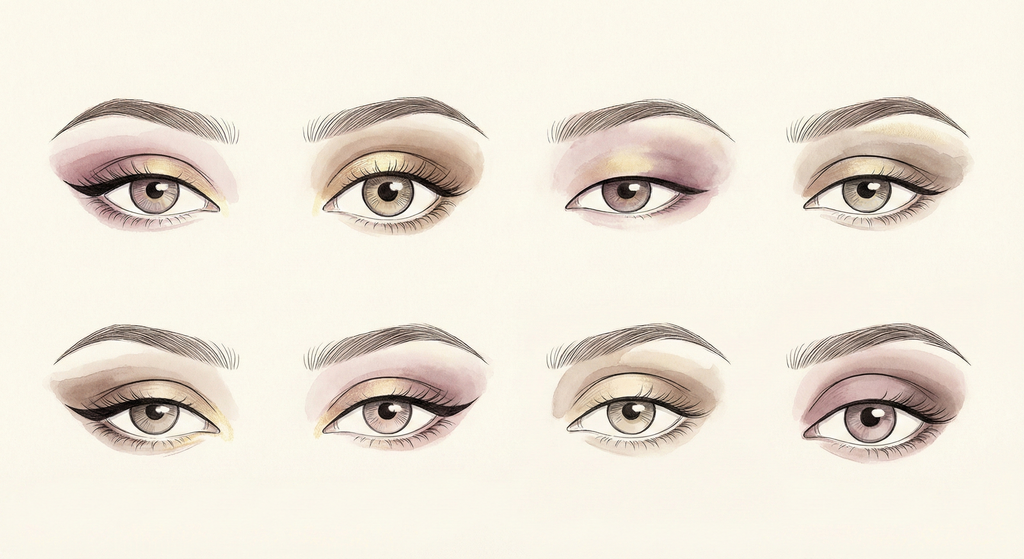
Understanding your face shape is half of the placement equation. The other half is your eye shape.
Here is the distinction: face shape determines where you place contour, blush, highlight, and brows (everything that happens on the broader canvas of your face). Eye shape determines where you place eyeshadow, liner, and lashes (everything that happens on the smaller, more detailed canvas around your eyes). The two systems work together but operate on different scales.
A person with a round face and hooded eyes needs different placement strategies than a person with a round face and almond eyes. The contour, blush, and brow advice stays the same, as that is driven by the round face shape. But the eyeshadow placement changes entirely because it is driven by the eye shape.
This is why generic tutorials so often miss the mark. Even if a tutorial is filmed on someone with your face shape, if they have a different eye shape, the eye makeup portion will not translate to your face. And vice versa: a hooded eye tutorial filmed on an oval face will give you great eye placement but the contour and blush advice may not apply if you have a square or round face.
The complete picture requires both. Your face shape tells you where to sculpt and add color across the face. Your eye shape tells you where to place shadow and liner on the lids. Combine the two and you have a full placement map for every product you use.
Face Shape vs. Eye Shape
Think of face shape and eye shape as two separate maps. Face shape is the zoomed-out map that tells you where blush, contour, and brows go on the broader face. Eye shape is the zoomed-in map that tells you where shadow and liner go on the lids. You need both maps for the full picture. Read our complete eye shapes guide to identify yours.
How BeautySpark Uses Face Shape Analysis
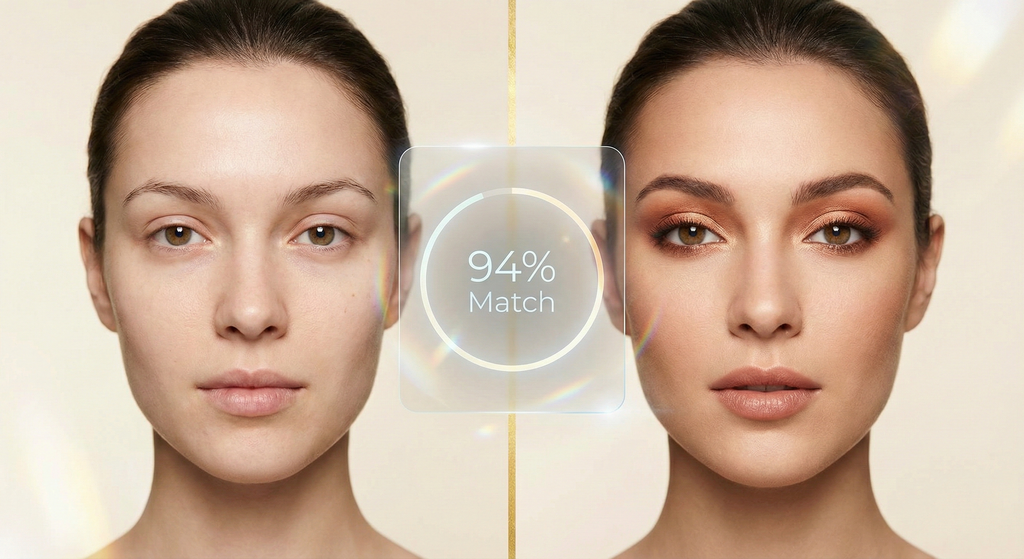
When you upload a selfie to BeautySpark, the AI does not just identify your color season. It also analyzes your face shape and eye shape as part of a complete facial assessment. The app determines whether your face is oval, round, square, heart, oblong, or diamond, and uses that information alongside your eye shape, skin tone, undertone, and color season to generate makeup recommendations that account for your entire face: not just which colors to use, but where to place them.
This means the looks BeautySpark generates are not one-size-fits-all templates with different colors swapped in. The placement, blending direction, and emphasis areas shift based on your unique combination of face shape and eye shape. It is the difference between a tutorial that happens to use your best colors and a tutorial that was designed for your face from the ground up.
Frequently Asked Questions
Your Placement Map Starts Here
Face shape is the foundation that every other makeup decision builds on. Once you know yours, contour has a purpose, blush has a destination, and brows have a shape that complements your bone structure instead of fighting it.
Combine your face shape placement with your eye shape techniques and your color season palette, and you have a complete, personalized approach to makeup that works with your features rather than against them.
Discover Your Face Shape and Get Personalized Makeup Looks
BeautySpark analyzes your face shape, eye shape, and color season in one selfie. Get contour, blush, and eyeshadow placement designed for YOUR face, not someone else's.