Punk eyeliner is defined by deliberate imperfection, intensity, and placement that refuses to follow the rules. The six core punk eyeliner techniques (smudged kohl, heavy lower waterline, graphic liner, inverted liner, lower lash cluster, and split liner) each carry a distinct edge. Adapting them to your color season keeps the look confrontational without working against your natural coloring.
What Makes Eyeliner "Punk" (vs. Just Dramatic)
Intentional Messiness, Not Accidental
The difference between punk eyeliner and a smudged mistake is control. Punk liner uses deliberate smudge, precise graphic shapes, or studied asymmetry, with each element landing where it's meant to land. The smudge goes where you put it. The gap at the outer corner is measured. The lower-line cluster is built stroke by stroke.
Placement That Subverts Convention
Standard eye makeup rules say: upper lash line for definition, blended crease for depth, clean lid for light. Punk eyeliner inverts these conventions. It builds intensity on the lower rim instead of the upper, skips the upper line entirely, or draws liner in places the standard playbook ignores: below the lower lashes, disconnected from the upper line, in a gap at the corner.
The Color Season Principle Applied to Dark Shades
Every color season carries warm or cool undertones that affect which dark shades look harmonious on you. Start by knowing your warm or cool undertone. Cool seasons (Summer, Winter) carry their liner best in charcoal, slate, and blue-black. Warm seasons (Spring, Autumn) work better with espresso, oxblood, and warm dark brown. Both families can wear pure black, but it looks harshest on Light Summer and Light Spring coloring where the contrast is too high. The techniques below include season adaptation notes for each.
Punk eyeliner works by breaking placement rules deliberately. Adapting the liner shade to your season's natural contrast level makes each technique look chosen, not borrowed.
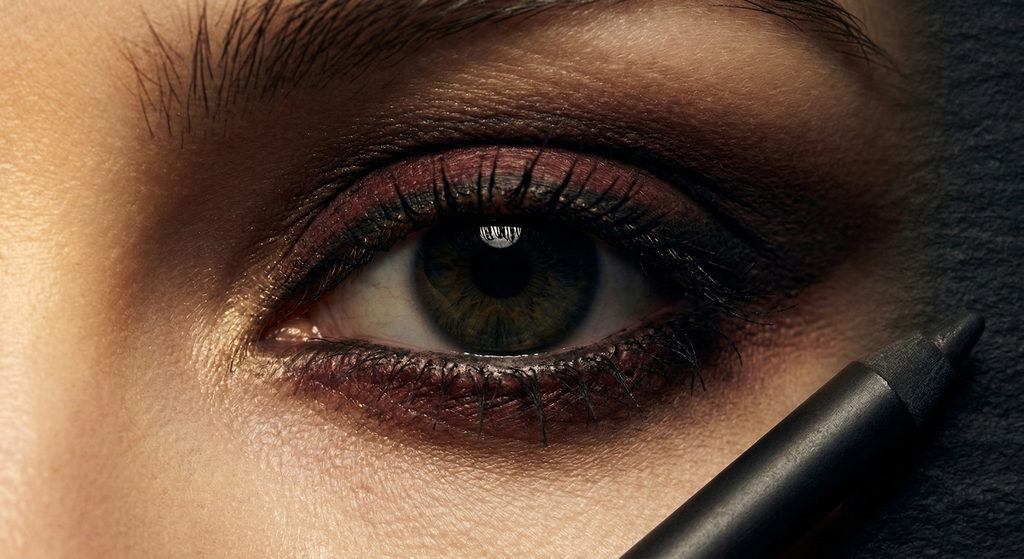
Find your color season to know which punk liner shades suit youTechnique 1: Smudged Kohl
Step by Step: Kohl → Smudge Brush → Shadow Lock
- Apply kohl pencil directly to the upper lash line, pressing it in close to the roots instead of drawing on top of the lashes.
- While the product is still warm and soft, use a small smudge brush or the rounded end of the pencil cap to drag the kohl upward and outward along the lash line. You want the outer edge to diffuse into shadow while the inner edge stays relatively dense.
- Lock the smudge with a matching dark eyeshadow pressed on top: espresso or charcoal depending on your season. This prevents fading and controls the spread of the kohl.
- Repeat on the lower lash line if the look calls for it, dragging the kohl downward instead of upward.
How Much Smudge Is Punk vs. Muddy
The punk smudge stays within roughly 3–5mm above the upper lash line. Beyond that, the liner looks muddy, not deliberate. The outer third of the line carries the heaviest smudge; the inner corner stays tighter or is left clean. On the lower lid, keep the smudge below the lash line. If it migrates above, the look appears accidental.
Season Adaptation: Warm Kohl vs. Cool Kohl
Warm seasons (Spring, Autumn) should reach for kohl in espresso, dark brown, oxblood, or deep terracotta. These shades carry the intensity without the blue-black harshness that can flatten warm skin tones. Cool seasons (Summer, Winter) handle charcoal, slate, blue-black, and dark plum better: these shades align with their cool undertone and create the contrast that looks sharp instead of heavy. Dark Autumn and Dark Winter coloring can sustain the heaviest smudge of any season; both carry the depth.
The smudged kohl technique lives or dies by the lock step: eyeshadow pressed on top is what separates a controlled punk smudge from a liner that creases and migrates within an hour.
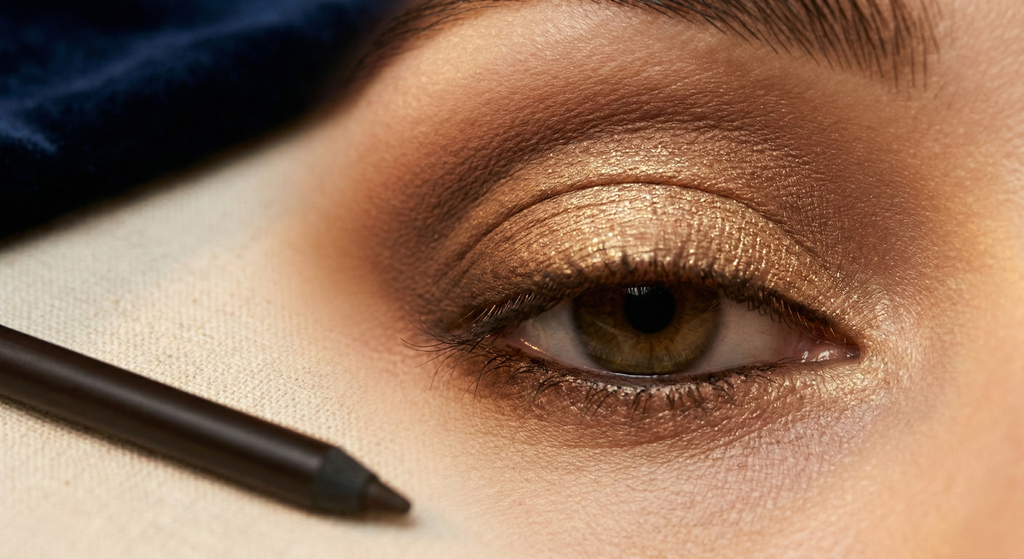
Technique 2: Heavy Lower Waterline
How to Apply Kohl to the Lower Waterline Without Irritation
The lower waterline is the inner wet rim of the lower lid, not the skin below the lashes but the mucous membrane itself. Applying liner here requires a product specifically formulated for waterline use: creamy kohl pencils work well; liquid liner does not belong here.
- Look upward gently to expose the lower waterline.
- Apply kohl in short, overlapping strokes along the waterline from inner to outer corner.
- Blink several times. The liner will settle and even out.
- If irritation occurs, stop. Some eyes respond poorly to waterline liner regardless of product quality.
The "More Than You Think" Rule for Intensity
Waterline liner disappears fast: the moisture of the eye breaks it down. Apply more product than looks correct on the first pass, then check the result after blinking. For a punk-level look, you want the waterline fully saturated so the white of the eye is minimised, giving the eye a smaller, more intense appearance.
Season Adaptation: When White or Nude Lower Line Serves You Better
Heavy dark lower waterline liner creates a closing, intensifying effect. For Light Spring and Light Summer coloring, where natural contrast is low, a completely saturated black lower waterline can overpower the face instead of accenting it. These seasons may prefer to bring the waterline dark only from the midpoint to the outer corner, leaving the inner half in a nude or flesh-toned pencil to keep the eye looking open at the inner corner. Dark Autumn and Dark Winter have the contrast to carry full-waterline saturation without it looking disproportionate.
The lower waterline delivers more punk impact per product than almost any other technique: it closes and intensifies the eye instantly, with almost no blending required.
Technique 3: Graphic Liner (Geometric, Disconnected, Architectural)
Basic Graphic Liner Shapes for Beginners
Graphic liner does not follow the lash line. Instead, it draws shapes (floating lines, triangles, dots, disconnected marks) that exist independently above or below the eye. Three shapes that work for beginners:
- Floating upper line: draw a line 2–3mm above the natural lash line, parallel to it, not connected. Leave the lash line itself clean.
- Lower triangle: at the outer corner below the lower lash line, draw a small filled triangle pointing downward. No upper line.
- Inner corner mark: a thick dot, a short horizontal line, or a negative-space cutout in existing liner, at the inner corner only.
Gel vs. Liquid Liner for Graphic Work
Liquid liner offers finer lines and dries faster, making it better for precise shapes with sharp edges. Gel liner in a pot, applied with a flat liner brush, gives slightly more control over line width and can be layered. For graphic punk liner where clean edges matter, liquid is the standard. For a slightly softer graphic effect, gel works well. Avoid pencil for graphic work: it lacks the precision edge.
Season Adaptation: Colored Liner for Warm Seasons
Graphic liner in black is available to everyone. But warm seasons, especially True Spring, True Autumn, and Bright Spring, often find that a graphic shape in deep warm brown, olive, or oxblood creates more character than black against their skin tone. The colored graphic looks more deliberately eccentric, less generically punk, which suits the warmth of these seasons. Cool seasons, particularly True Winter and Dark Winter, carry graphic black liner at its most severe and architectural.
Graphic liner is the most sculptural of the six punk techniques: it works entirely outside the lash line, which means precision matters more than pressure.
Discover Your Perfect Eye Look
Get your first AI-personalized look in under 5 minutes.


Technique 4: Inverted Liner (Lower Lid Instead of Upper)
The Floating Lower Line: Step by Step
Inverted liner replaces the conventional upper lash line with a line drawn along or just below the lower lash line, creating the impression that the eye's emphasis is inverted.
- Leave the upper lash line completely clean.
- Using a liquid or gel liner, draw along the lower lash line starting from the outer corner and working inward. End the line at or just past the pupil, not at the inner corner: this keeps the eye from looking downturned.
- Optional: at the outer corner, extend the lower line slightly downward in a short tail, angling toward the outer cheekbone. This follows the natural downward slope of the outer eye instead of the conventional upward wing.
- Keep mascara on the upper lashes but minimal on the lower lashes. The lower liner is the statement; the lower lashes should not compete with it.
Which Eye Shapes It Suits Best
Inverted liner benefits eyes that naturally sit with more prominence on the upper lid: prominent eyes, round eyes, and protruding eyes. It directs attention downward and softens the upper orbital area. Hooded eyes and deep-set eyes may find the lower line makes the eye appear smaller; in those cases, keeping the lower line only at the outer half (from the pupil to the outer corner) preserves openness while retaining the punk inversion. See the full eye shape guide for technique-specific adaptations.
Inverted liner is the most subversive of the six techniques because it ignores the lash line everyone expects: the effect is deliberate displacement, not deliberate intensity.
Technique 5: No-Wing Lower Lash Cluster
Spidery Lower Lash Emphasis Without an Upper Line
This technique builds visual weight on the lower lash line using liner instead of mascara. The result is a spider-leg or cluster effect, with the upper lid and lash line left completely bare. It is the opposite of the conventional upper-line-only approach.
Step by Step: Multiple Thin Strokes Below Lower Lashes
- Start with no upper liner or eyeshadow.
- Using a fine-tipped liquid liner, draw individual short strokes downward from the lower lash line, mimicking individual lashes but extending further than natural lashes would. Vary the lengths slightly: longer strokes at the outer corner, shorter toward the center and inner corner.
- Space the strokes 1–2mm apart. They should not connect into a solid line.
- Add two or three slightly thicker strokes at the outer corner to suggest clustering.
- Leave the upper lash line completely clean. The contrast between the bare upper lid and the detailed lower cluster is the point.
The no-wing lower lash cluster looks most punk when the upper lid is left completely bare: the asymmetry between the decorated lower lash line and the empty upper lid is the deliberate subversion.
Technique 6: Split Liner (Upper and Lower with Intentional Gap)
Step by Step: Deliberate Gap at Outer Corner
Split liner draws the upper and lower lash lines as separate elements that do not meet at the outer corner, which is the conventional point where a wing or extension would connect them. The gap is the technique.
- Draw the upper lash line from the inner corner to approximately two-thirds of the way along the upper lid. Stop before the outer corner.
- Draw the lower lash line from the outer corner inward, stopping at a point that leaves a visible gap from where the upper line ended.
- The gap should be between 3–6mm depending on eye size. Larger eyes can sustain a wider gap; smaller eyes work better with a tighter one.
- At the outer corner of the upper line, make a small blunt end (not a pointed wing) to emphasize the intentional stop.
How to Make the Gap Look Intentional, Not Accidental
The gap looks deliberate when both lines are clean-edged and confident. Hesitant, faded-out line ends look accidental; squared-off or cleanly blunt line ends look architectural. Use a liquid liner with a precise tip and draw the ending stroke with the same pressure as the rest of the line instead of trailing off. If the lines are uneven at the gap, a cotton bud with micellar water can clean the edges without disturbing the rest of the liner.
Split liner relies on the confidence of the gap: clean, deliberate line endings at the outer corner are what separate the technique from an unfinished wing.
Quick-Reference: Punk Liner Techniques
| Technique | Best For | Liner Type | Season Adaptation |
|---|---|---|---|
| Smudged Kohl | All-day wear, approachable punk | Kohl pencil | Warm: espresso, oxblood; Cool: charcoal, slate |
| Heavy Lower Waterline | Maximum intensity, minimal blending | Creamy kohl pencil | Light seasons: partial only; Dark seasons: full rim |
| Graphic Liner | Editorial, architectural | Liquid or gel | Warm seasons: oxblood, olive; Cool: sharp black |
| Inverted Liner | Subverted classics, round eyes | Liquid or gel | Any season; colored liner for warm seasons |
| Lower Lash Cluster | Bare-lid punk, fine detail | Liquid (fine tip) | Any season; warm seasons use dark brown strokes |
| Split Liner | Precise, studied asymmetry | Liquid (precise tip) | Any season; gap width scales with eye size |
Each technique can be worn at any contrast level: the season adaptation shifts the liner color, not the technique itself, keeping the punk vocabulary intact across all coloring.
Frequently Asked Questions About Punk Eyeliner
The punk eyeliner approach is technique-first, product-second: once you know which of the six techniques suits your eye shape and coloring, the liner itself becomes secondary to the placement decision.